BurpSuite - How to Proxy an Agentic Browser
Quick How-To Guide for setting up a Burp Suite Proxy in order to inspect the flow (and contents) of requests that a browser sends out. In This case, specifically for Perplexity's Comet Browser.

Purpose
This is a quick little “how to” guide on helping individuals gain insight into what is exactly happening with these “Agentic Browsers”. This came about as I have been working on various small bug-bounties as side projects and digging deeper into tools such as Burp Suite. This guide will help you (whoever you are, hello!) to be able to read the HTTP/HTTPS requests going on while using any browser. This is very helpful if you are looking to reverse engineers APIs that AI models are using or understand what traffic looks like for this new breed of internet browser.
What will be needed
- A VM running whatever OS that can support the target browser (For my PoC, I used Virtual Box running a Windows 10 VM)
- BurpSuite as well as the desired browser installed in the VM
What we are doing
To put simply, we will be using the Burp Suite Proxy capabilities in order to read the HTTP/HTTPS requests that the browser (in this case, Comet) is sending and receiving. What this means is that we are setting up Burp Suite as a man-in-the-middle between the browser and the internet. This allows us to intercept the traffic between the browser and websites, inspect and manipulate these requests, and see how the receiving server responds.
This enables us to see/manipulate all sorts of fun things like…
- HTTP headers, cookies, and authentication tokens
- POST data
- API calls and responses
- JavaScript files, images, and other resources
The general HTTP side of this is pretty straight forward, but the HTTPS requires a bit more finagling. For this, Burp Suite performs SSL/TLS termination through…
- Generating SSL certs for each site
- Decrypting traffic
- re-encrypting before sending.
Process
1) Install Your desired VM Manger (I enjoy KVM on Linux) 2) Setup the desired VM and OS 3) install BurpSuite and the Browser of choice 4) Go to the OS Proxy Settings (PoC for Windows OS) - Go to “Manual Proxy” > Turn On, and make sure the Proxy settings are set to 127.0.0.1:8080 (Local host). - Burp Suite listens to traffic on the local host 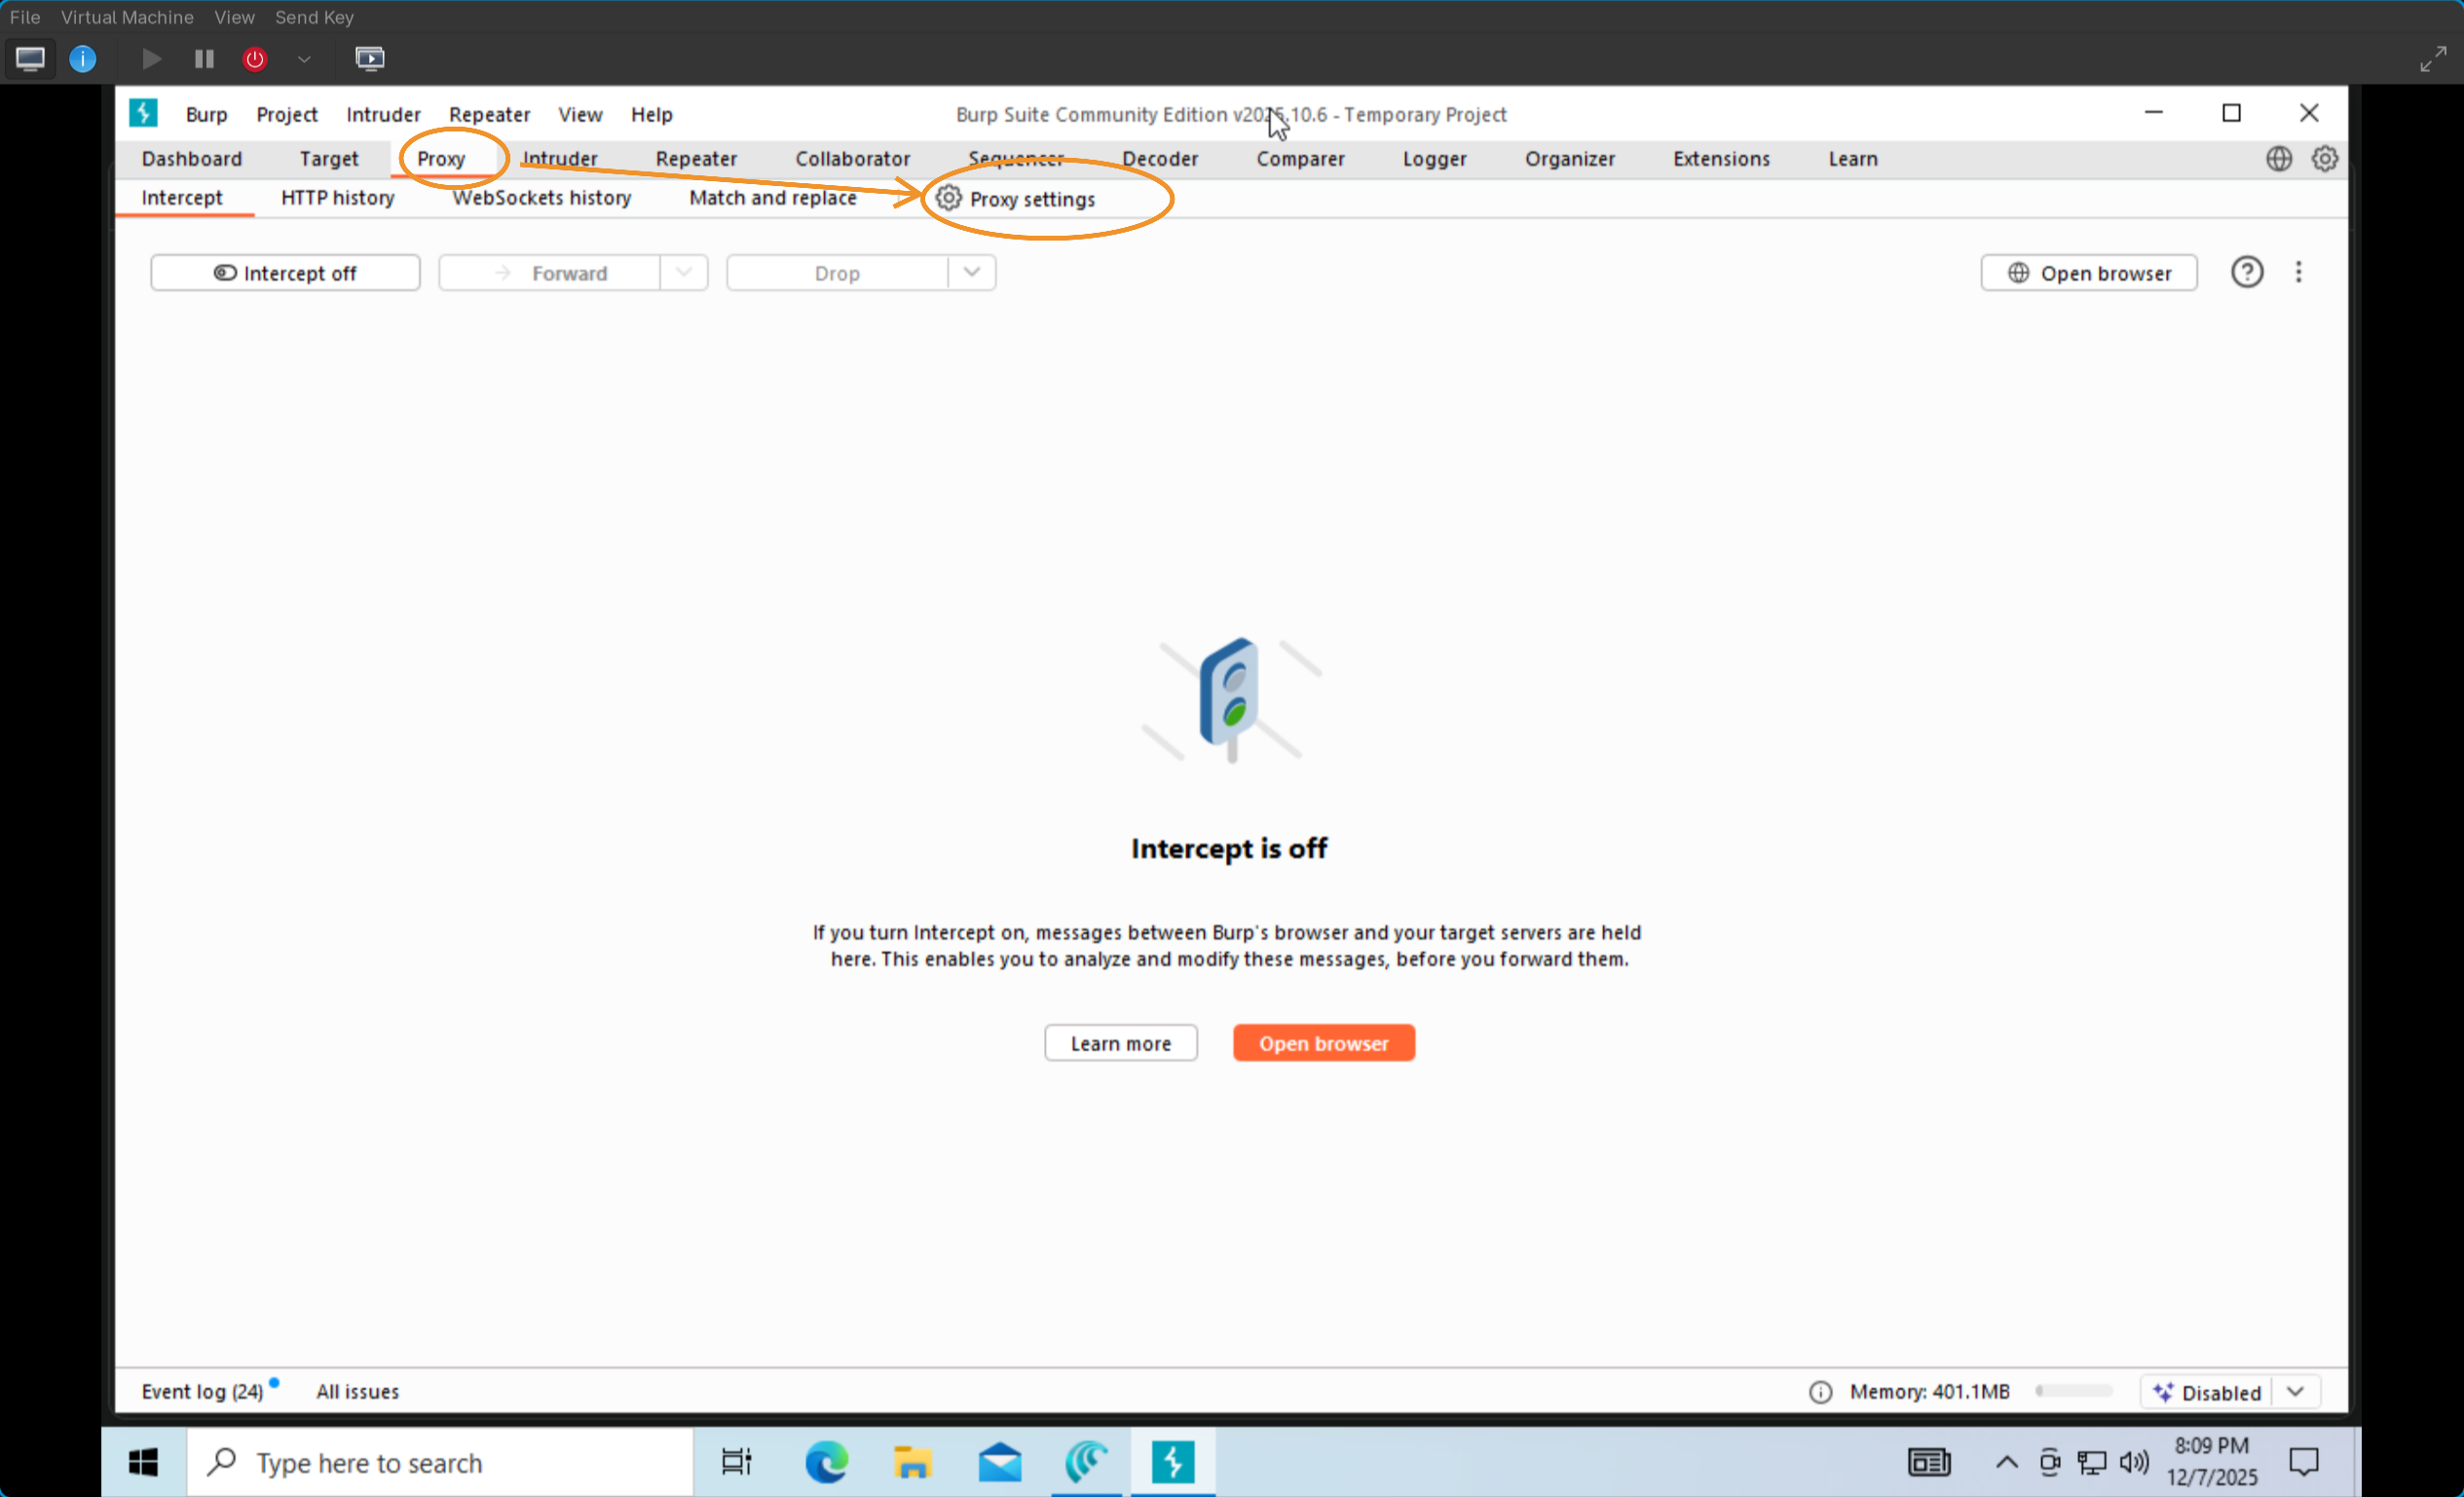 5) Open Burp Suite > Proxy > Proxy Settings - click “import / export CA certificate” and export it as a DER file.
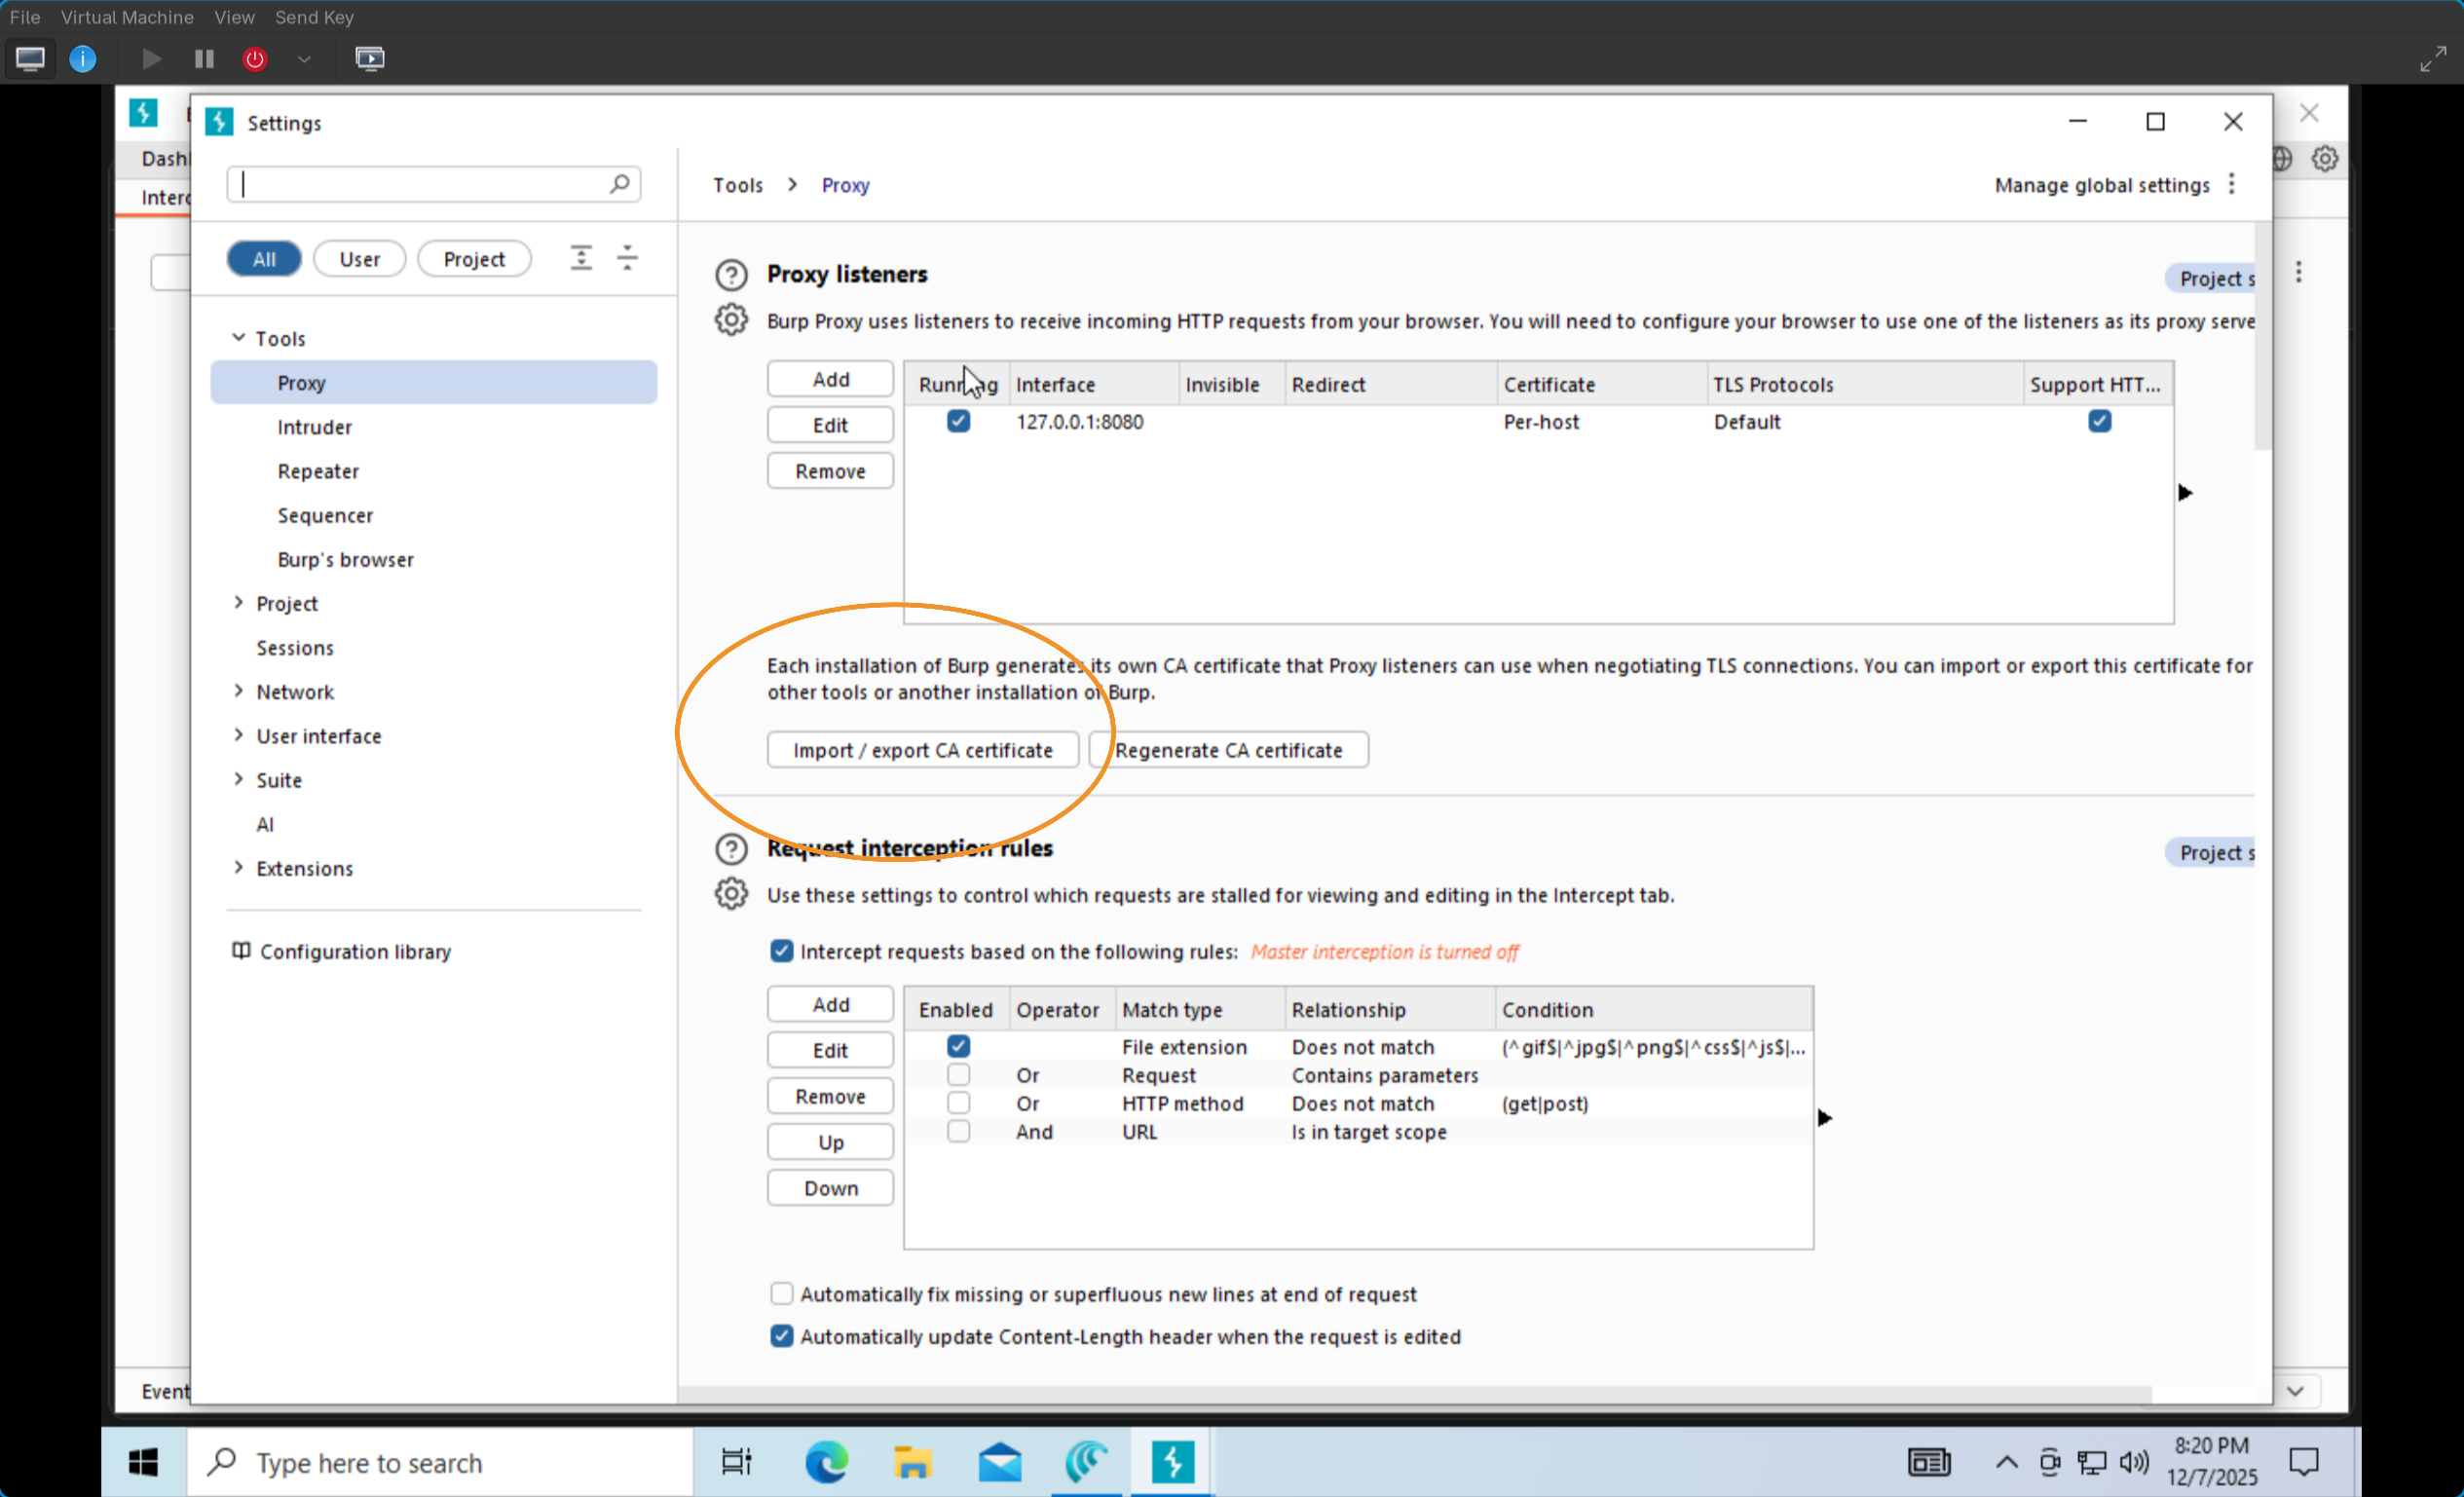
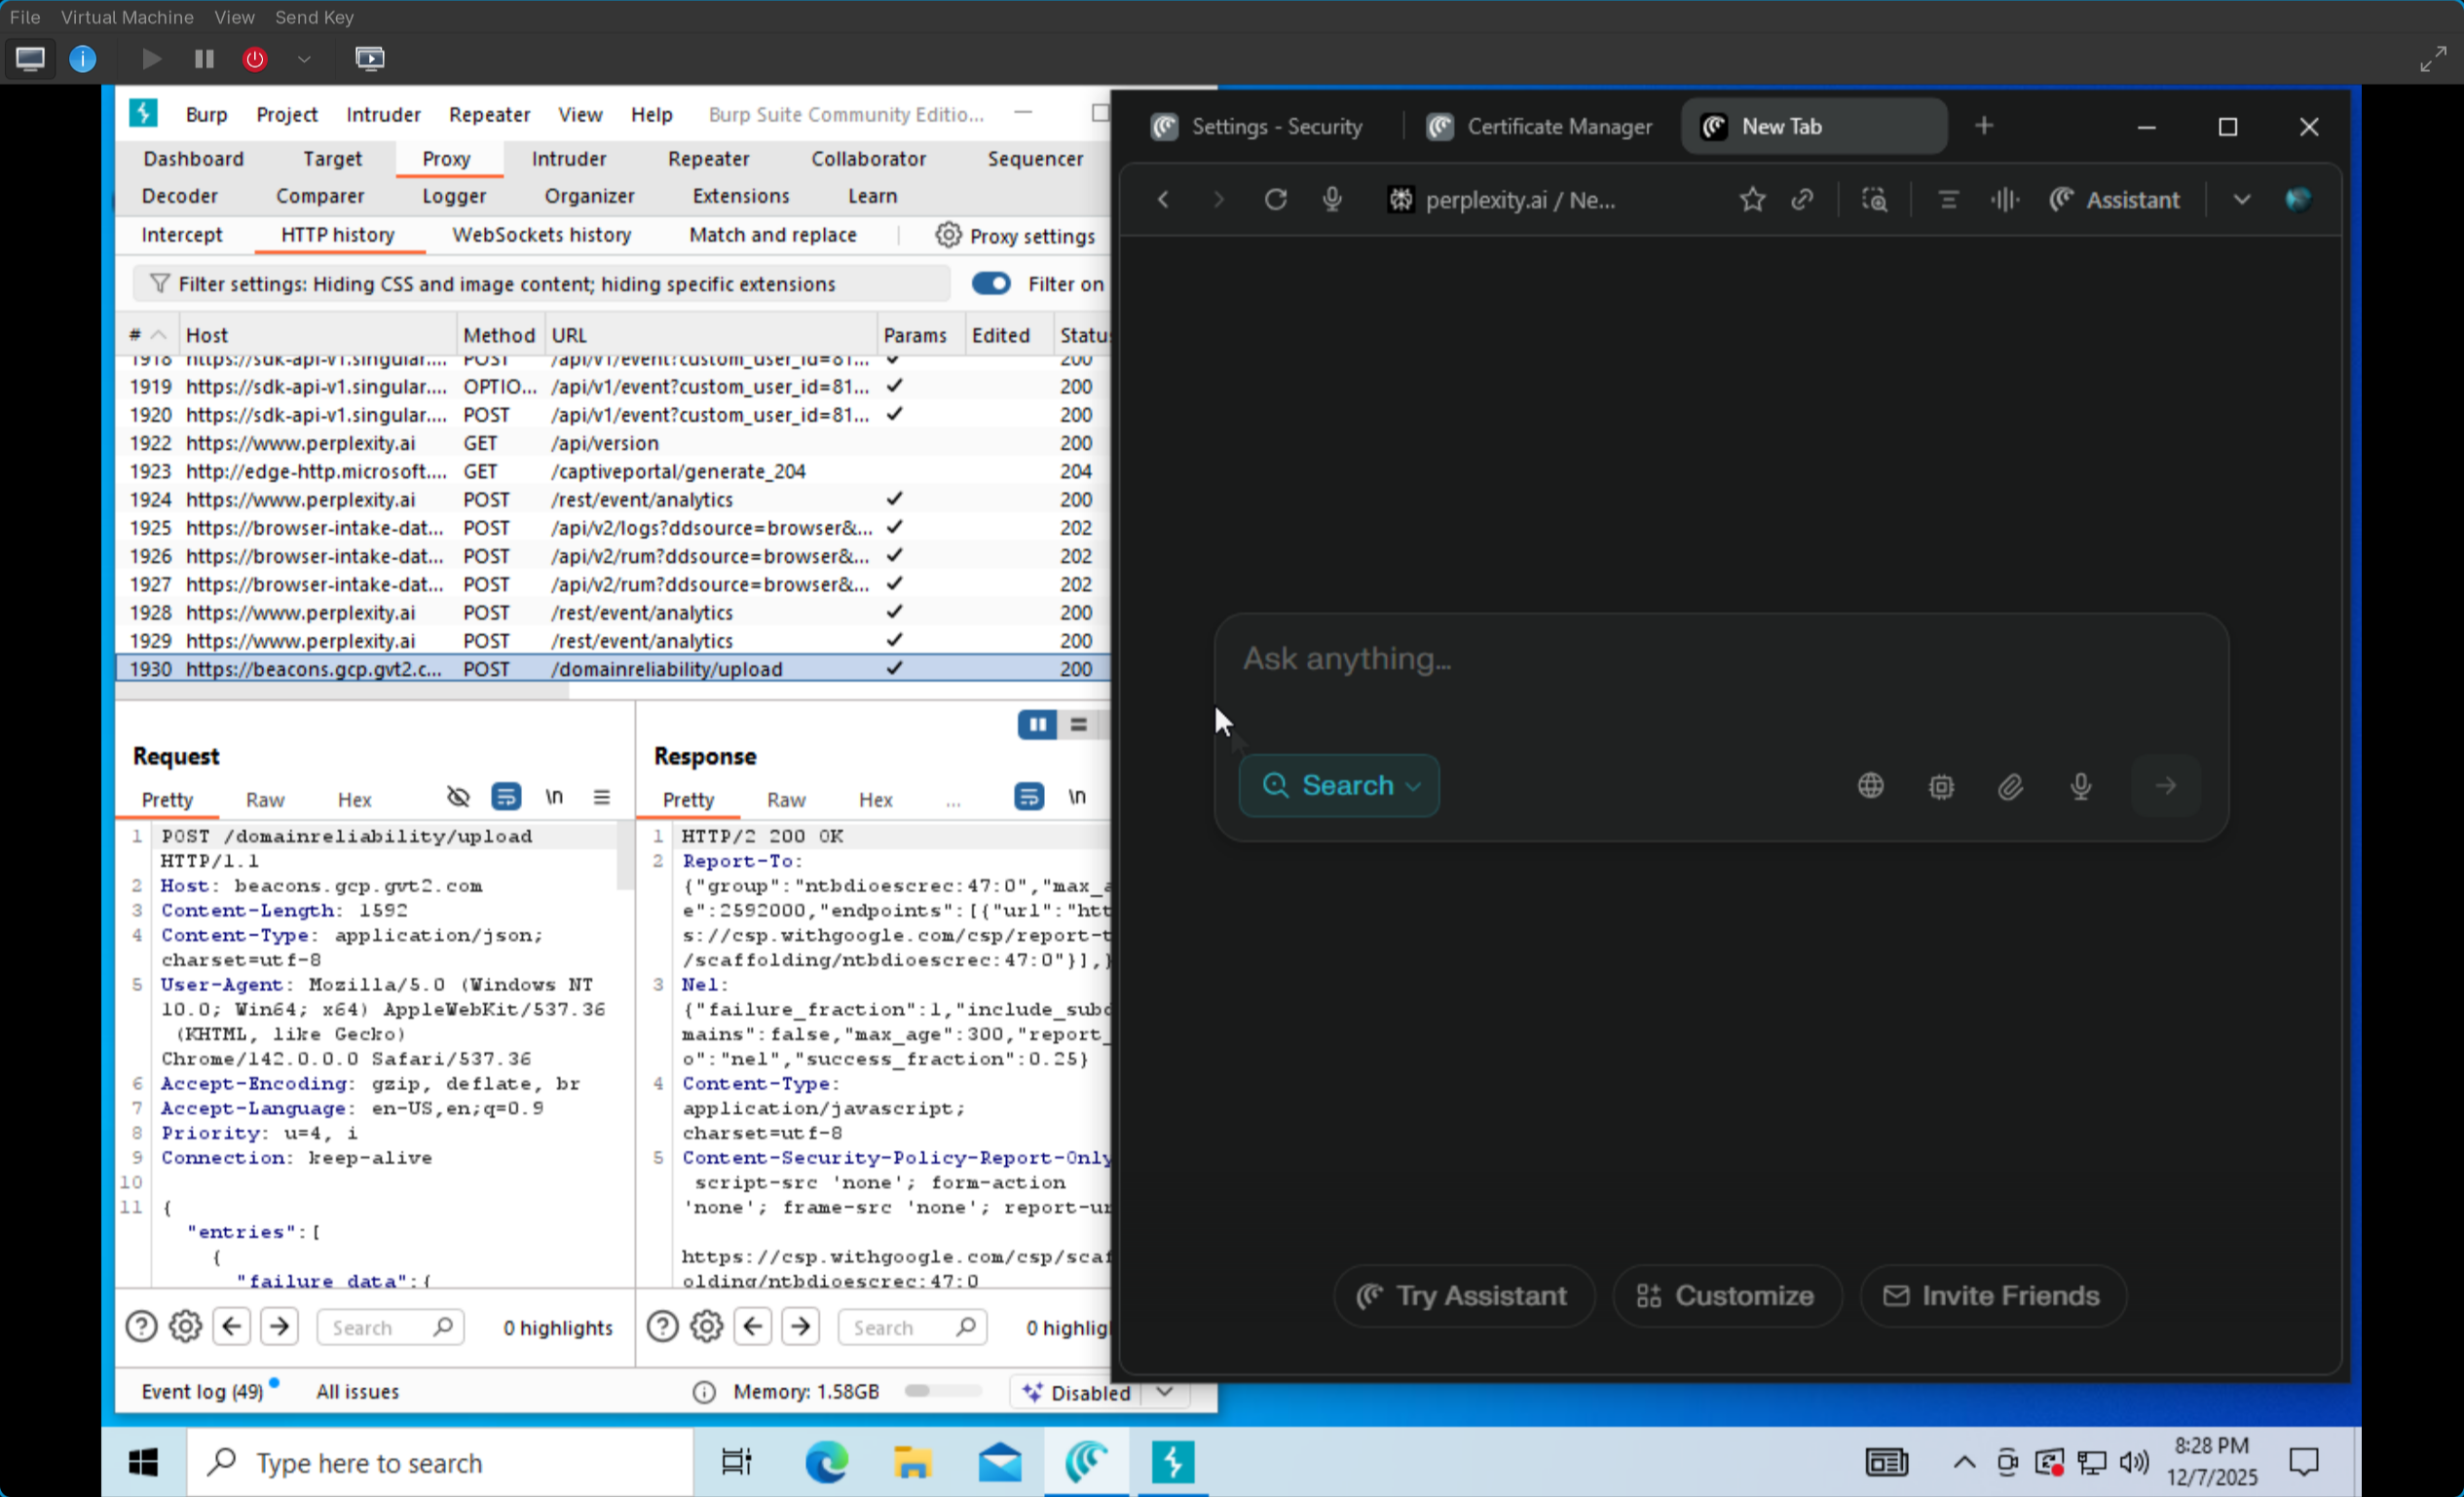
6) on the desired Browser go to Settings > Security and Privacy > Security > Manage Certifications > Custom Certifications > then install the export DER file in the “trusted” category. 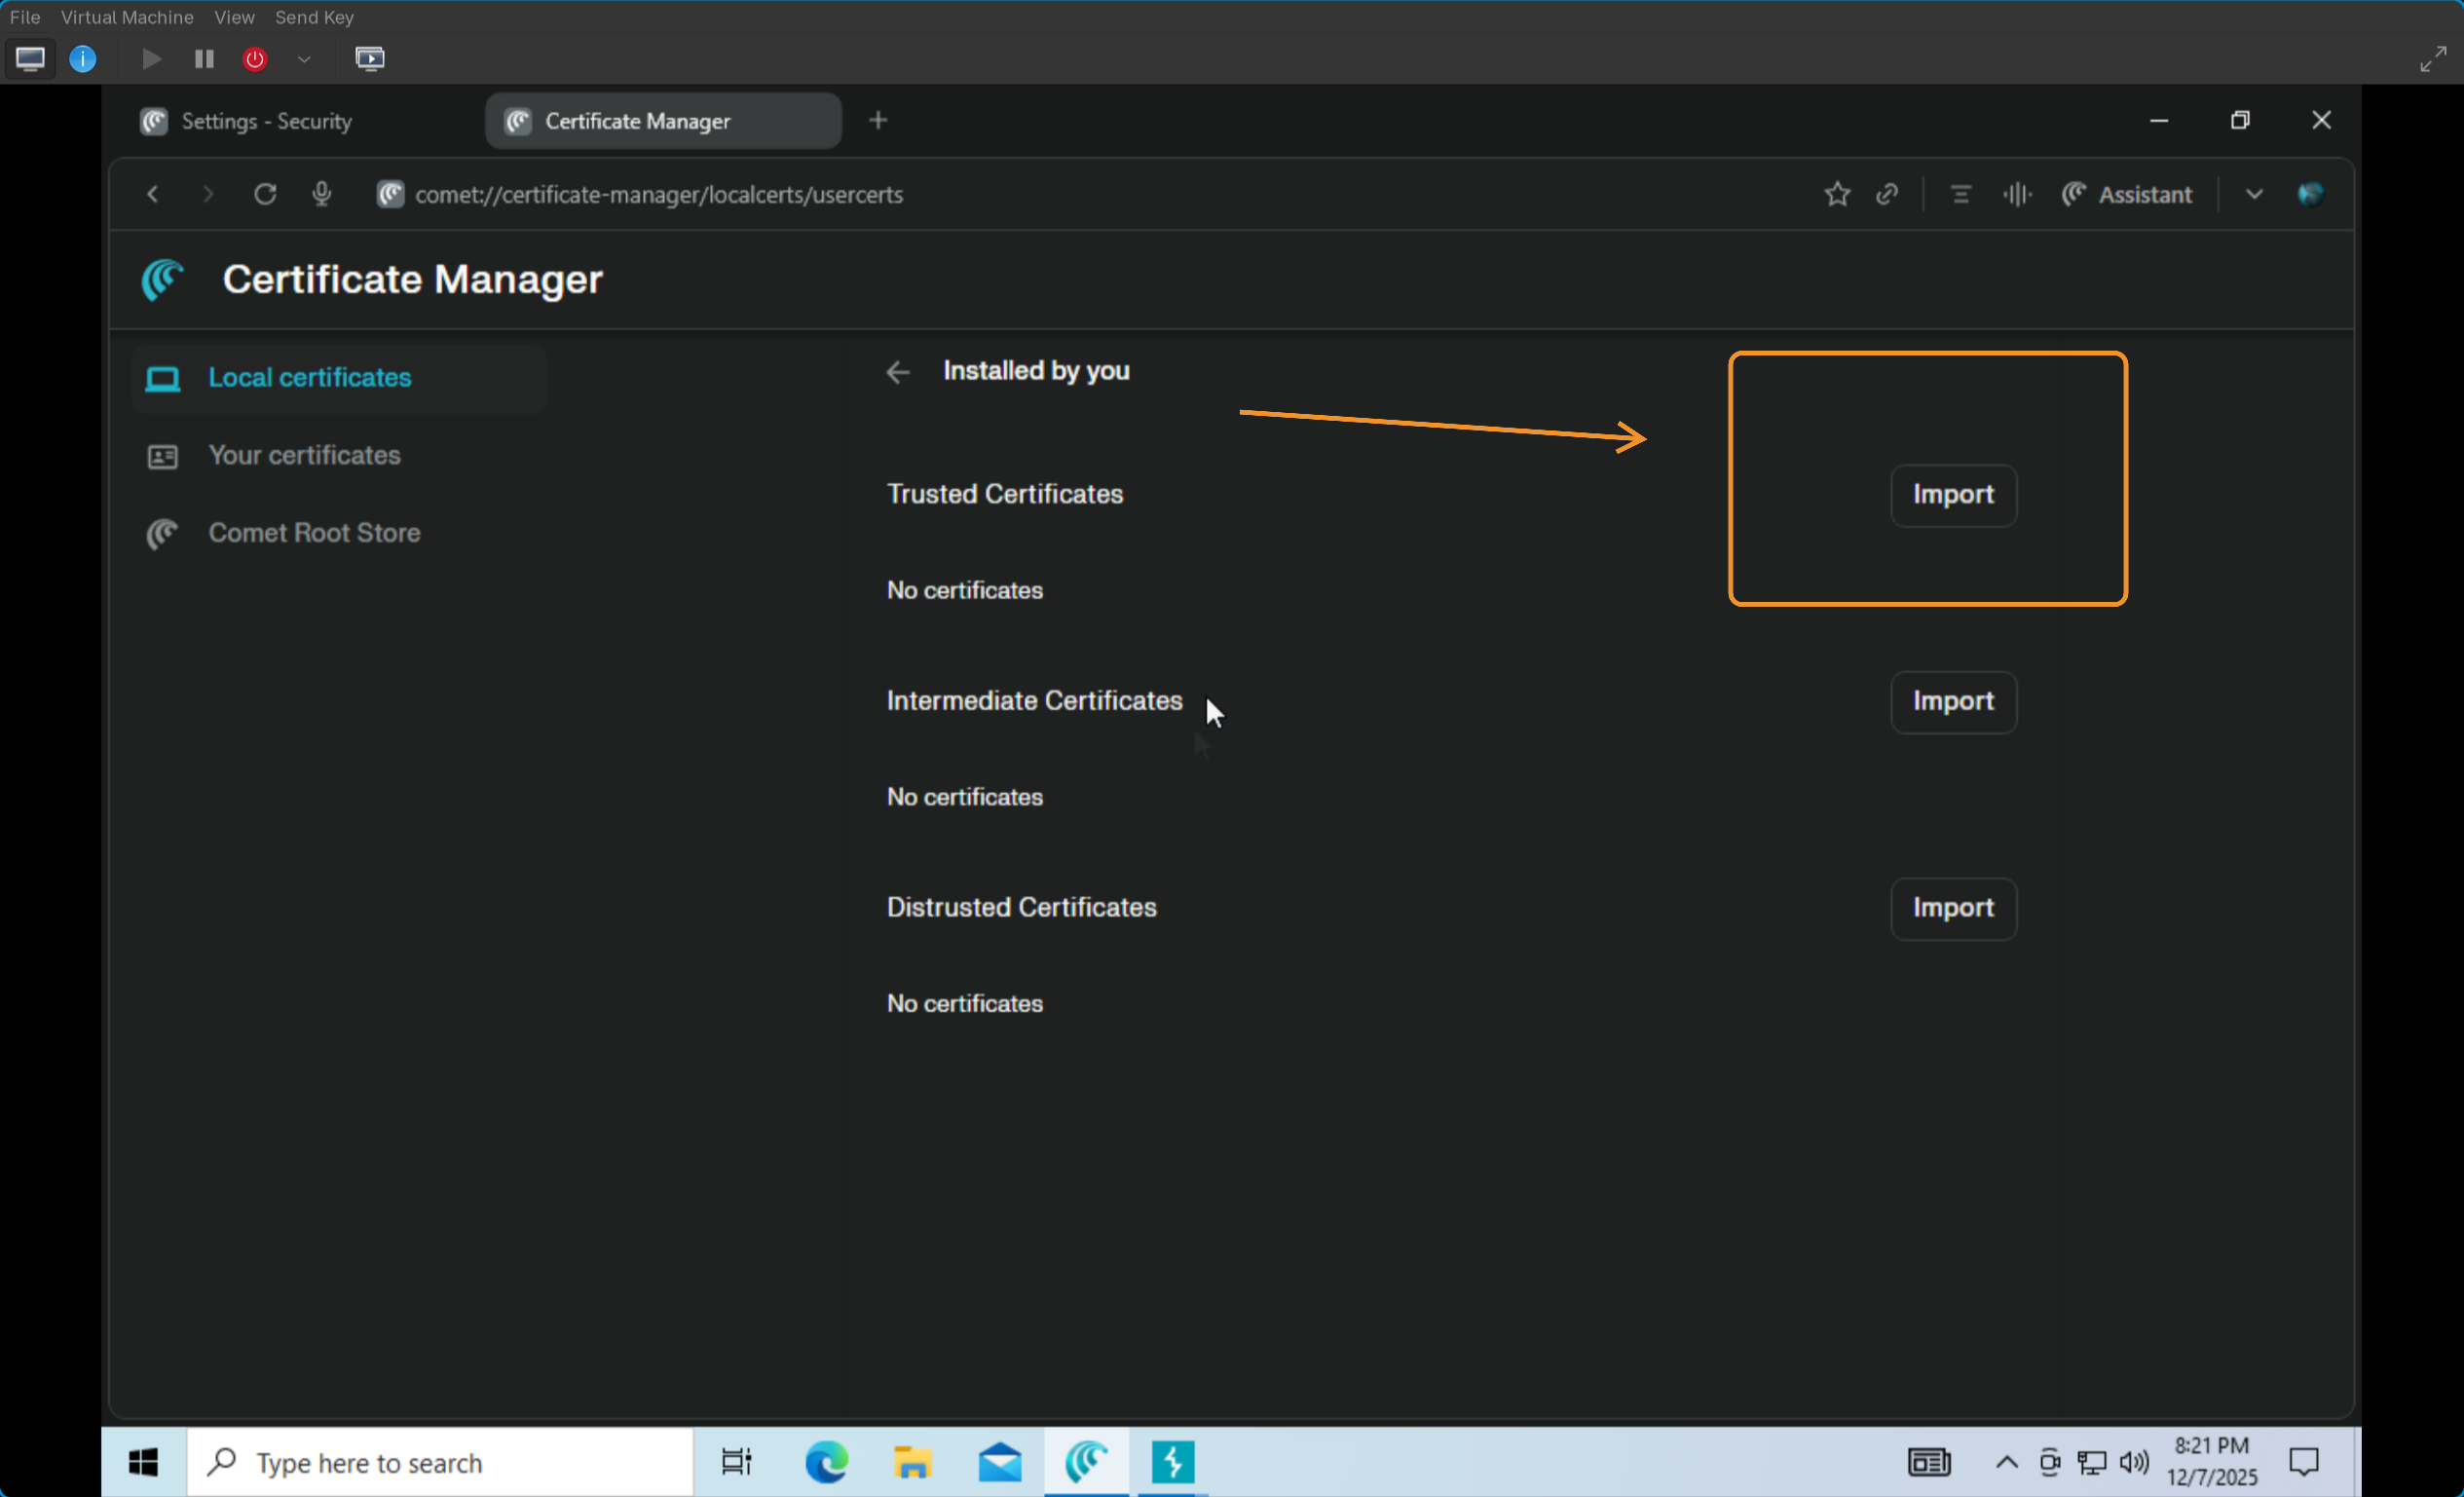 7) Once this is done > If you go back to Burp Suite > Proxy > HTTP History > You should now be able to see the browser requests in real time! Trying clicking around the browser, opening tabs, sending requests, and see as those GET Requests start showing up in Burpsuite.
WARNING
- if BurpSuite is turned off, the browser will still try to use the Proxy and will fail.
That is all for now, Thank you for taking a moment to glance at this! Cheers,