ProxMox Lab Part 1
How-To Guide for setting up a ProxMox lab environment for the first time. Part 1.

The goal of this project was to provide myself with a dedicated homelab that would allow myself to continue my project work no matter my location! For this to work I leveraged my understanding of Tailscale to setup the Proxmox in my network so that I could VPN to it from my laptop.
Proxmox can be used for various applications, but for me I wanted a way to specifically work on using some Penetration tools such as Metasploit and Powersploit. So by the end of this lab there will be full instructions on how to…
1) Setup a Proxmox Server 2) Dial on a Tailscale VPN connection for remote work 3) Install: - Kali-Linux VM - Debian VM - Windows VM
With this environment setup I will be able to jump into testing exploits and penetration tooling on the fly without having to worry about where I am doing it or how I would setup the situation for it to be possible. In the Part 2 article I will demo how to properly setup a OpSense Firewall VM in order to isolate these devices from the rest of the network.
The initial Setup
- The biggest choke-point for this project was getting hardware. With it being 2025, the price of hardware is exceptionally gone up… Luckily the largest thing I wanted to run was Windows and not any AI workloads, so getting a hold of older hardware was not that hard.
- I was lucky that a individual I knew was getting rid of a old work optiplex Micro Form factor PC because it was struggling to support Windows 11. It came with 8 GBs of Ram, a core i7 (16 cores, not bad!), and 256 gbs of Storage.
- After scrounging around I found a 4th gen 16 GB ram stick in the SO-DIMM form factor for free! So this meant I had enough head room for memory, storage, and cores to run a few VMs at the same time. Perfect.
- To boot Proxmox it wasn’t anything special, just a 32 GB usb-stick and creating a bootable drive using BalenaEtcher on a Arch Linux PC. But using Rufus on Windows or similar software would work just as fine.
Note on Using Proxmox
- Something I didn’t realize until I booted it up for the first time was that Proxmox’s GUI is really only accessible via it’s IP address.
- So in order to get more then just a command line you need to go to a device on the network and type in it’s IP and login with the root credentials you created on setup.
- This is also where the remote-access with Tailscale comes in handy! Once you have it turned on in the same VPN you can type in it’s Tailscale IP and get to the GUI that way as well!
Changing Repository reference to be non-enterprise.
- ProxMox by default is a enterprise solution. This means it is referencing Repositories that REQUIRE a subscription to use. This becomes problematic when you try to update your
aptpackage manager. As soon as you useapt-getto install anything you will notice this error as well. So in order to use Proxmox in a lab like fashion you HAVE TO switch the repository it is referencing from the Enterprise > Community one.
NOTE on
sudo
- I never use
sudoin any of these commands - that is because on Proxmox you sign-in with a root account by default. So everything is done as a root user.
1) Disable Enterprise Repositories
1
2
3
4
5
# Disable PVE enterprise
mv /etc/apt/sources.list.d/pve-enterprise.sources /etc/apt/sources.list.d/pve-enterprise.sources.disabled

# Disable Ceph enterprise
mv /etc/apt/sources.list.d/ceph.sources /etc/apt/sources.list.d/ceph.sources.disabled
2) Remove the Old .list File and Create Proper .sources Files
1
2
3
4
5
6
7
8
9
10
11
12
13
14
15
16
17
18
# Remove the incorrectly formatted file
rm /etc/apt/sources.list.d/pve-no-subscription.list

# Create proper PVE no-subscription repo
tee /etc/apt/sources.list.d/pve-no-subscription.sources <<EOF
Types: deb
URIs: http://download.proxmox.com/debian/pve
Suites: trixie
Components: pve-no-subscription
EOF

# Create proper Ceph no-subscription repo
tee /etc/apt/sources.list.d/ceph-no-subscription.sources <<EOF
Types: deb
URIs: http://download.proxmox.com/debian/ceph-squid
Suites: trixie
Components: no-subscription
EOF
3) Update to fix any dependency issues
1
apt update
- After this process, when you do
apt updateagain, you will notice that there will no longer be errors! This fixes any weird bugs you might have with 3rd party software packages like Tailscale later on.
Remote Access - Tailscale
- The goal I had with this lab was to have a place I could test things out effectively WITHOUT having to do it on my local laptop. While I love my laptop, a designated server-like experience that I can remote into whenever I want, edit things, and be sure I won’t loose if my laptop fails is a VERY nice thing to have.
- My quick and scrappy solution is Tailscale - an application level VPN.
- To learn how to setup a Tailscale account - go here (it’s free for hobbyists!)
- To install Tailscale on your Proxmox server, simply get the installation script from your Tailscale account by clicking Add Device > Linux Server.
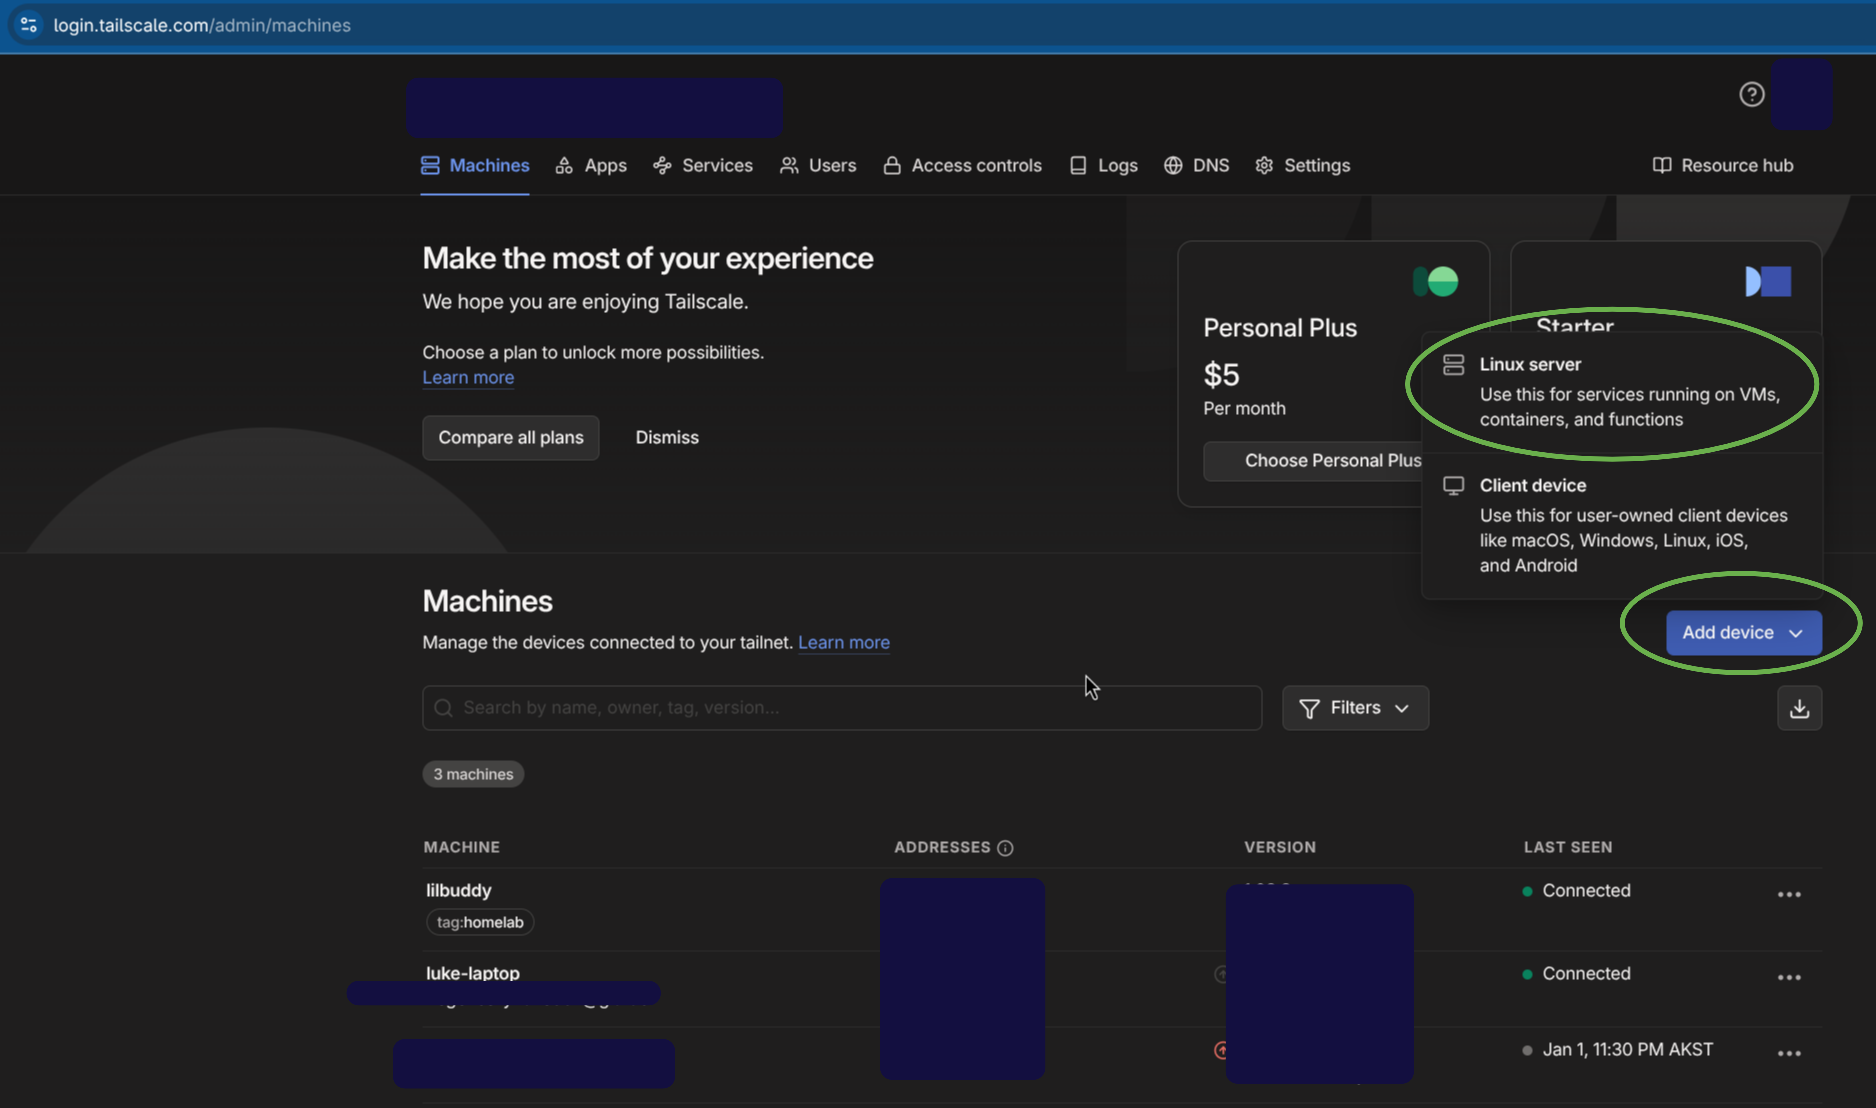
- At the bottom of the page you will see an installation script once you click generate install script.
- Paste this into the Shell of the Proxmox host, delete
sudofrom the script (you are already a root user), and go for it. - If it works with no errors you will need to login to your tailscale account via a web-browser using the link provided on the terminal (doesn’t have to be the Proxmox web-Browser though! Can just be any computer’s browser) and verify that the connection is okay to be made.
- After the initial setup, you will see the new device present on your Tailscale Account with a dedicate IP address: You can now use that IP address (and specifying port 8006) to gain remote access to that computer As long as your current computer is also attached to your tailscale network.
Curl
- In order to do this step you might have to install the
curlpackage.- This is a key package that allows for all sorts of data transfer functionality from downloading things from remote servers (in this specific case) to testing various API.
- If you try to install Tailscale and you get a “command not found” error, go ahead and run the below. Then try again
- Another note is I have no use of
sudoin this command. THat is because when you login to ProxMox as root… You are ALREADY at root so no need to escalate priviledges. Everything is run from a escalated state.
Installing ISO images
- I found it to be the most bandwidth efficient to do a
curlcommand in the command-line for the ProxMox server. Uploading from a remote laptop or some other method created way too much bandwidth throttling. The server is plugged into 500MB+ download speeds, and forcing to rely on the upload speed of my laptop (1-2 MBs per second… yay Alaska!) is a drag. - To download a new ISO from the Shell you can do the following:
# You will need to be in the main directory
cd ..
cd var/lb/vz/template/iso # entering the directory with the iso images
curl -L -O  https://cdimage.kali.org/kali-2025.4/kali-linux-2025.4-installer-amd64.iso #installing a iso image using the curl command

# This example is for installing the Kali-Linux distro
- you will need to go to the
cdimage.website.comof whatever distro you want to find the installation. - Once you find the exact download link you want, right click and copy path. that will be the
https://Download link address - Note:
-Lforces the installation and stops the redirect that commonly happens-Osaves the file as the original iso name, so the naming will be (in the above example) kali-linux.iso instead of the whole link as the name.
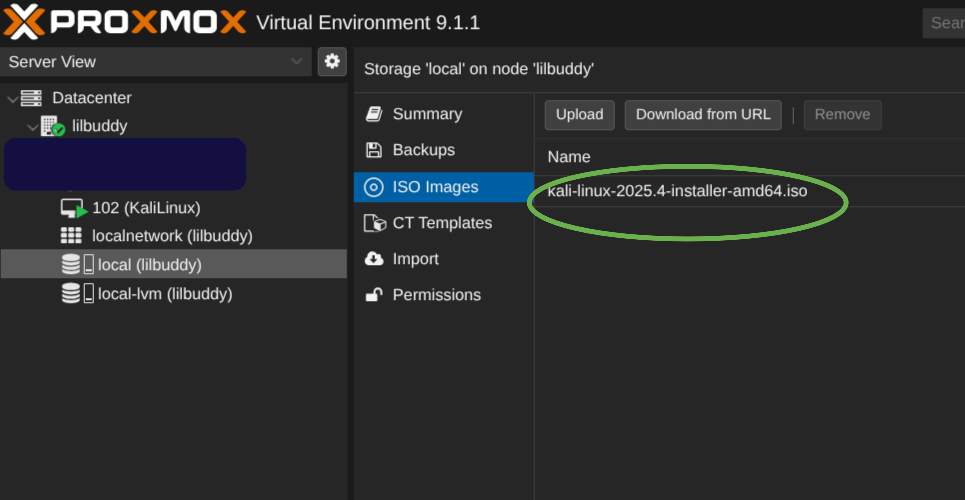
- You should see it pop up in the ISO Image tab under local storage! Once it is there you can now go ahead and spin up a VM using that iso! ![[screenshot-2026-01-02_16-11-56.png]]
- The following are the list of ISOs I downloaded for this project:
- https://cdimage.kali.org/kali-2025.4/kali-linux-2025.4-installer-amd64.iso
- https://cdimage.ubuntu.com/daily-live/current/resolute-desktop-amd64.iso
- https://fedorapeople.org/groups/virt/virtio-win/direct-downloads/archive-virtio/virtio-win-0.1.285-1/virtio-win.iso
- NOTE: on the second line of ISO Image, make sure to specify the name of the file. I had to start the download initially sometimes to verify that the name was correct
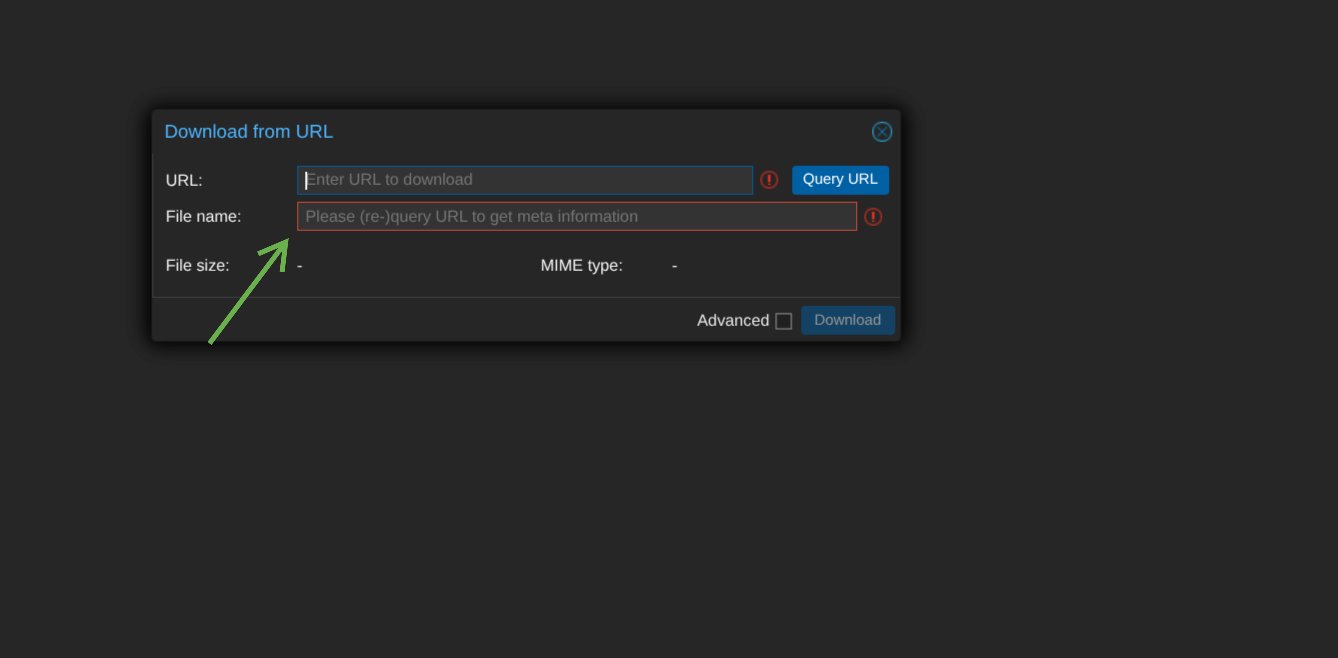 ![[screenshot-2026-01-06_10-24-42.png]]
Spinning up the VMs
- If you have dealt with Virtual Machines before this isn’t anything special. Exactly what you would expect with having to do the OTB experience for each machine.
- The exception is the Metasploitable 2 VM - this is a vulnerable VM so you have to be a little more careful with this one.
Vulnerable VMs I would be very careful when spinning up Metaspolitable 2 as a VM. Since up to this point there is no traffic control between these VMs and the rest of the network you are on, it might be worth to wait until a Firewall is deployed before setting this up.
Conclusion
And now you should have a fully functional ProxMox server with multiple VMs all of which can ping and talk to each other. The next step will be to setup a Firewall VM to manage these connections, take logs, and keep these potentially insecure VMs away from the rest of the network.